Assigning a shared folder on a network drive (NAS, WebDAV, ..)
After clicking the Select drive/folder button for the selected storage location (Source, Destination, A or B) a standard Windows
folder picker dialog box (Select folder) pops up.
Browse and select the folder you want to assign in the picker dialog. There are basically 2 methods to find and select the shared folder:
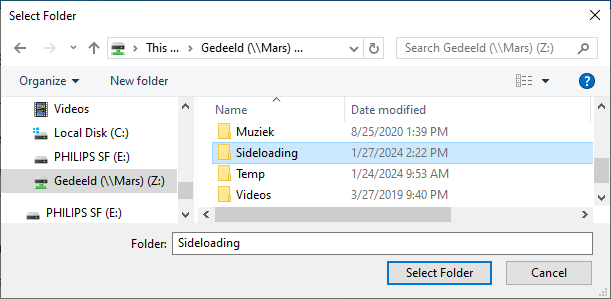
Shared folder mounted on a drive - This option applies to a Windows configuration where the shared folder is mounted as a
network drive via a local network file access protocol (e.g. with a local NAS) or WebDAV (when accessing
files on a webserver). In this case there is a network drive in Windows with a drive letter assigned (W:, X:, Y:, Z:, ..).
Fig.1 - Select shared folder from a mounted drive.
Open the drive, find the folder and select it.
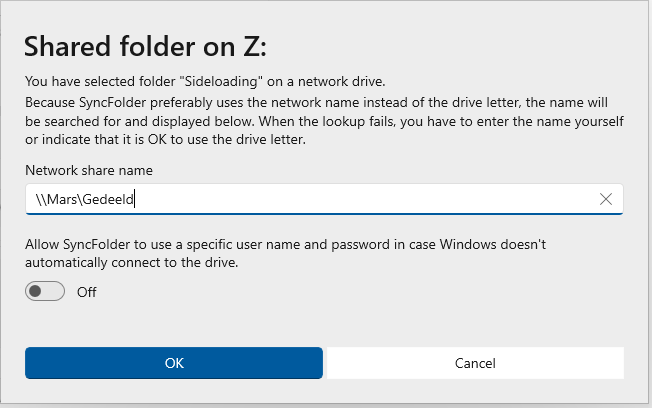
When done, the app will open a dialog window that indicates that SyncFolder is trying to convert the drive letter to a so-called UNC network
share name, and an option to explicitly configure the access credentials for the drive. See next section for the latter.
Fig.2 - Dialog with the network share path name.
By using the network share name instead of the drive letter the app at any time will be able to access the device. This can be important
for instance when a task has to run immediately at startup of the computer and the storage medium has not yet been reassigned/mounted
in Windows.
If the app couldn't resolve the network share name then you can indicate in the dialog that the app is allowed to access the
drive using the assigned drive letter.
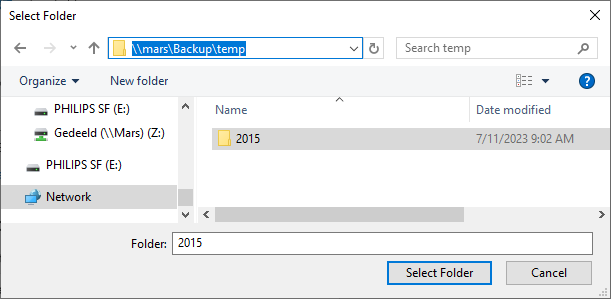
Shared folder accessible using a network path - This option is for situations where the folder on the network drive/server is not
mounted in Windows but must be accessed using a network path name. You then must specify the full path of the storage location
(e.g. \\192.168.0.77\projects\..) manually. Do this by typing the path in the top address textbox of the Select folder window.
Fig.3 - Typing the full path of a network device.
The address bar allows you to specify a locally accessible network share (using the special \\server\share URI syntax) or a share
that is available on a local or external website that supports the WebDAV protocol. Use the https://server/path URI syntax in that
case. Locate the folder and select it.
Alternatively you can also locate the folder by finding the storage device via the Network section in the left navigation panel.
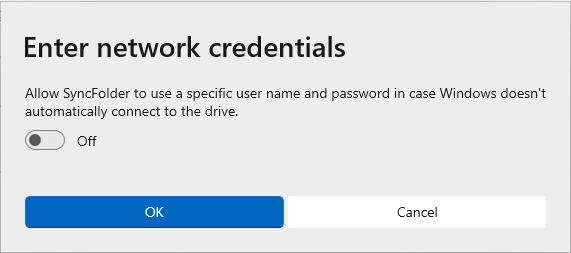
When the folder is selected the app shows a similar dialog as above but now only with the option to configure the drive access
credentials.
Fig.4 - Dialog with only the user credentials option.
Define user credentials explicitly
By default the app assumes that the access credentials for the folder have already been setup and registered earlier in Windows. In most
cases there is indeed no need to configure these credentials additionally in the above dialog. Click the OK button then to close
the dialog.
SyncFolder can however fail to connect to a shared folder on a network drive in case Windows doesn't automatically
connect to the drive or for some reason has lost the connection when a task starts.
In order to work around this you can opt to specify the user credentials explicitly for the source and/or target network location. To do this:
toggle the switch in the dialog to On. The dialog then allows you to enter the user crendentials and test if the connection with the
entered credentials succeeds.
Possible errors that can come up with the test are:
0 - The test is not allowed because the network drive is currently connected in Windows. You must first disconnect the drive, then do the test,
and finally reconnect the drive.
Note: If you disconnect the network share but you still have other shares connected to the same resource (i.e. the 'server' part in
\\server\share) then the test will still fail. In that case it is suggested to use either the server's ip address (like in \\192.168.2.3\J) if
the other shares are defined by a server name, or define a unique name for the server using a DNS alias or an entry in the Windows hosts file.
53 - The network path was not found.
86 - The user name or password is incorrect.
1219 - Windows doesn't allow access to a shared drive using a different name/password than the one that is currently assigned in Windows.
This error also occurs when you provide the wrong credentials and the drive is disconnected.
1326 - The user name or password is incorrect.
The username and password will be saved in the Local Settings folder of the app in encrypted form against the ID that has been assigned to the
task.
WebDAV
When you have selected a WebDAV folder you will see that the pathname of the selected folder includes the website
share address and the selected folder name with some extra SSL and DavWWWRoot info in it.
Example: if you selected the Documents folder on
https://use01.thegood.cloud/remote.php/dav/files/someone@example.com/ the configured pathname will be:
\\use01.thegood.cloud@SSL\DavWWWRoot\remote.php\dav\files\someone@example.com\Documents.
Good to know: SyncFolder uses the built-in Windows 10 WebDAV Redirector of the WebClient service to retrieve folder information and
copy files and folders to and from the shared folder on the website. This service normally runs automatically as a result of a service
trigger in Windows. If you experience that the app can't connect to the website then check if the WebClient service might have been stopped.
You can verify this by doing a right click on the Start menu and selecting Computer Management.
Expand Services and Applications and select Services.
Scroll down until you see the WebClient service and double click on it to open settings.
Possible issues with assigning a shared network folder
A couple of things to know:
If the network drive is not shown in the Network section and the drive is a shared drive on another Windows 10 computer
then it might be necessary that you have to start Function Discovery Resource Publication service on that computer.
Do this by starting the program 'services.msc' on that computer. How? Type Windows Key + R,
then type services.msc, and press Enter.
Then change the startup type of this service to 'Automatically delayed'. Finally, right click on the service and start
them up yourself.
If the network drive is a NAS device then you might have to enable WS-Discovery on your NAS. For security reasons some devices don't
enable this by default resulting in your NAS not being visible in Network in Windows File Explorer.
Consult the instructions that come with your NAS to enable it.
If you want to work with a network share that is not permanently mounted but one or more other shares on the same server are, then it is important to
understand how Windows deals with access to such a share.
If the share must be accessed with the same user credentials as all the others then you are good to go and there is no need to explicitly configure the
user credentials.
If the share requires different credentials then you must explicitly configure this as described above, but you will have to assign the 'server' part
in \\server\share either by means of its ip address or a unique server name. See the description of 'error 0' in the previous section.